Using the Setting Menu
Personal Setting
The personal setting screen contains two tabs: personal information and measurement interval.
Parameters set under the personal setting will be reflected when you review your test data.
Personal information
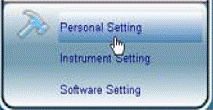
In the main menu, point to

and then click to the “Personal Setting” button (Figure 3).
Personal information screen shows first.
You can enter settings by clicking on

or typing numbers.
Figure 3

Measurement interval
This program provides users to organize data according to eight intervals set in this menu.
- Select the Measurement interval tab.

- Select AM or PM first by clicking
 or
or  .
.
- Change the hour and the minute by directly click on it. Then directly type the desired number or click
 or
or  to make changes.
- Click
 button to save your information. The double confirm window will jump out. Click “OK” button to save the information you filled in.
Instrument Setting
The Instrument Setting allows you to do meter settings from your PC, including meter’s memory deletion and time setting.
Delete the meter’s memory
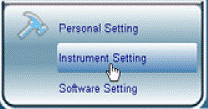
- Click the Instrument Setting button (Figure 4). Delete the meter’s memory screen shows with step-by-step procedures.
Figure 4

- For Step 1, follow instructions to connect the meter to your PC. At Step 2, select the instrument. For communication port, you can select “Autodetection” option for automatically locating the correct COM port of your meter.
- Click
 button. The confirm window will jump out. Click “OK” button to go to Step3.
- In Step3 screen, click
 button to delete the meter’s data. The double confirmation window then jumps out. Click “Yes” button to delete the meter’s data or click “No” button to return to the previous screen.
- After you click “Yes” button, the meter’s data is completely cleared. Click
 button to return to the Delete the meter’s memory screen.
Set the meter’s time
- Select the Set the meter’s time tab in the Instrument Setting screen. Then it shows step-by-step procedures.

- For Step 1, follow instructions to connect the meter to your PC. At Step 2, select instrument. For communication port, you can select “Autodetection” option for automatically locating the correct COM port of your meter.
- Click
 button. The confirm window will jump out. Click “OK” button to go to Step3.
- In the Step3 screen, two options can be selected. Clicking on “Time” allows you to match the meter clock time with your PC clock time. Clicking on “Time Setting” allows you to set the meter clock by directly typing the desired number or by clicking
 .
.
- Click
 button to save the settings. The time setting is complete.
Software Setting
The Software Setting allows you to set the display of the software, including languages and units.
Those settings will be shown when you review data in this software system.
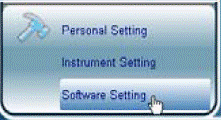
Click Software Setting button (Figure 5) and the screen displays.
Select the desired setting by clicking

. Click

button to save the setting you made.
Figure 5

 and then click to the “Personal Setting” button (Figure 3).
  or typing numbers.


 or
or  .
.  or
or  to make changes.
  button to save your information. The double confirm window will jump out. Click “OK” button to save the information you filled in.
 button. The confirm window will jump out. Click “OK” button to go to Step3.
 button to delete the meter’s data. The double confirmation window then jumps out. Click “Yes” button to delete the meter’s data or click “No” button to return to the previous screen.
 button to return to the Delete the meter’s memory screen.
 button. The confirm window will jump out. Click “OK” button to go to Step3.
 .
. button to save the settings. The time setting is complete.
 . Click
  button to save the setting you made.
